In my last blog I talked about creating the SAPUI5 Hello World – First SAPUI5 Application. This blog talks about creating the first SAPUI5 MVC application.
A Very Brief Introduction to MVC
MVC stands for Model-View-Controller. It is an architectural pattern (not a design pattern) for the Presentation layer. In MVC, the Model manages the application data, the View defines and renders the user interface, and the Controller reacts to the user interaction with the View by modifying the View and Model.
Prerequisites
Create an MVC Application Project for SAPUI5
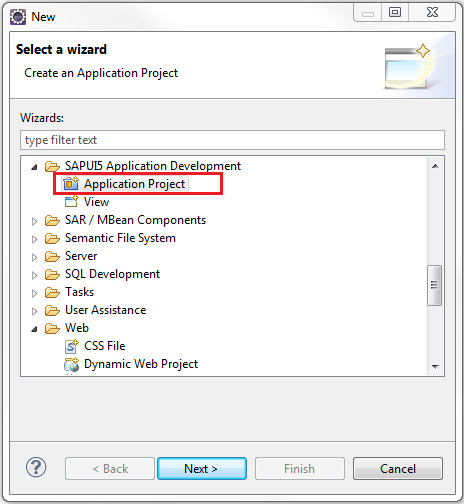
Open Eclipse and go to the menu option, File -> New -> Other…. In the New window, open the node SAPUI5 Application Development and select the option Application Project. Click on the Next button.
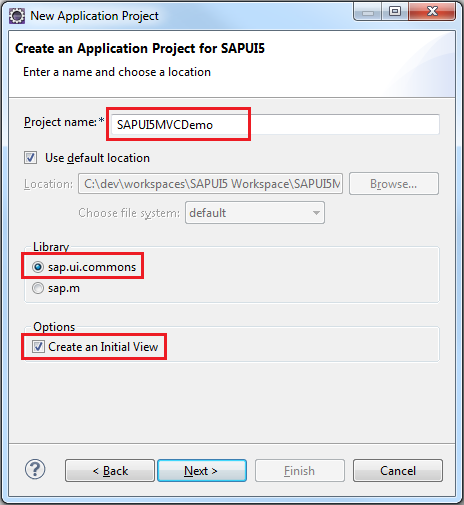
Provide a name to the project. Let’s call it SAPUI5MVCDemo. Select the library sap.ui.commons and keep checked the option Create an Initial View. Click on the Next button.
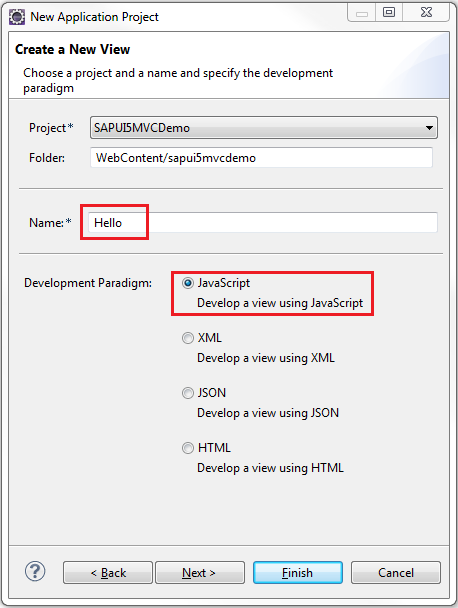
In the next window, provide a name to the view. Let’s call it Hello. Select the Development Paradigm as JavaScript. This will create a view in JavaScript. Click on the Next button.
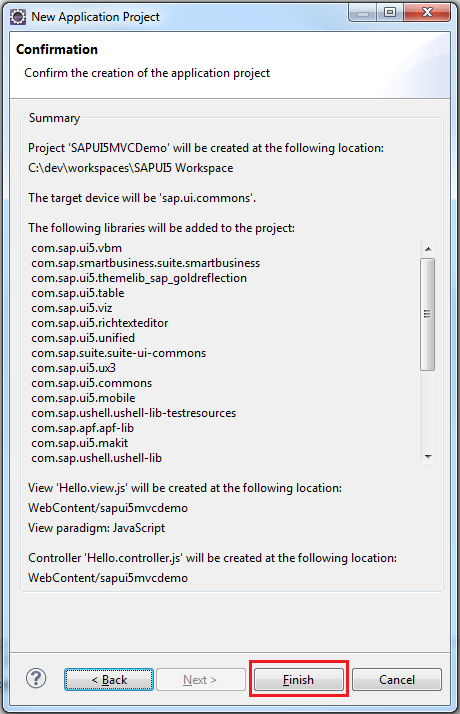
The next window will provide a summary of all the artifacts to be generated and their locations within the project. Click on the Finish button to finally create the project.
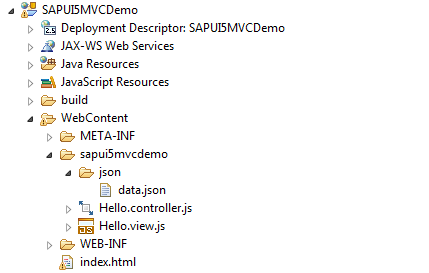
In the newly created project, navigate to the folder WebContent. Right-click on the folder named sapui5mvcdemo and create a new folder called json. Within it, right-click and create a new file named, data.json. It contains JSON format data which will be used to populate a JSON model. Copy-paste the following content in data.json
{
	"labelname":"Please enter your name:",
	"username":""
}
The project structure should now look similar to the one shown below
Create Model and Load Model Data
For this example, we will create the model in the index.html file. Copy the code below and paste it in your index.html file.
<!DOCTYPE HTML>
<html>
<head>
<meta http-equiv="X-UA-Compatible" content="IE=edge">
<meta http-equiv='Content-Type' content='text/html;charset=UTF-8' />


<script src="resources/sap-ui-core.js" id="sap-ui-bootstrap"
	data-sap-ui-libs="sap.ui.commons" data-sap-ui-theme="sap_bluecrystal">

</script>
<!-- add sap.ui.table,sap.ui.ux3 and/or other libraries to 'data-sap-ui-libs' if required -->

<script>
	// create JSON model instance
	var oModel = new sap.ui.model.json.JSONModel();

	// set the data for the model
	oModel.loadData("sapui5mvcdemo/json/data.json");

	// set the model to the core
	sap.ui.getCore().setModel(oModel, "myDataModel");

	sap.ui.localResources("sapui5mvcdemo");

	var view = sap.ui.view({
		id : "idHello1",
		viewName : "sapui5mvcdemo.Hello",
		type : sap.ui.core.mvc.ViewType.JS
	});

	view.placeAt("content");
</script>

</head>
<body class="sapUiBody" role="application">
	<div id="content"></div>
</body>
</html>
The JavaScript code, var oModel = new sap.ui.model.json.JSONModel(); will create a JSON model which will be filled with data from our previously created file data.json using the statement oModel.loadData("sapui5mvcdemo/json/data.json"); Finally, the statement, sap.ui.getCore().setModel(oModel, "myDataModel"); attaches the model to the SAPUI5 core with an alias myDataModel . A model attached to the sap.ui.getCore() can be accessed globally by various controls.
Create View and Bind UI Controls with Model
Copy the code below and paste it in your Hello.view.js file.
sap.ui.jsview("sapui5mvcdemo.Hello", {

	/**
	 * Specifies the Controller belonging to this View. In the case that it is
	 * not implemented, or that "null" is returned, this View does not have a
	 * Controller.
	 *
	 * @memberOf sapui5mvcdemo.Hello
	 */
	getControllerName : function() {
		return "sapui5mvcdemo.Hello";
	},

	/**
	 * Is initially called once after the Controller has been instantiated. It
	 * is the place where the UI is constructed. Since the Controller is given
	 * to this method, its event handlers can be attached right away.
	 *
	 * @memberOf sapui5mvcdemo.Hello
	 */
	createContent : function(oController) {

		var aControls = [];

		var myDataModel = sap.ui.getCore().getModel("myDataModel");

		// Create a label
		var lblName = new sap.ui.commons.Label({
			id : "lblName",
			text : "{myDataModel>/labelname}"
		});

		aControls.push(lblName);

		// Uncomment to view the contents of the model
		//alert(myDataModel.getJSON());

		// Create an text field
		var txtName = new sap.ui.commons.TextField("txtField", {
			// bind text property of textfield to username
			// property in the model
			value : "{myDataModel>/username}"
		});

		aControls.push(txtName);

		// Create a button to submit the name
		var oBtn = new sap.ui.commons.Button({
			id : "btn",
			text : "Submit",
			press : oController.hello
		});

		aControls.push(oBtn);

		return aControls;

	}

});
The code within the createContent : function(oController) method generates the UI controls within the <body></body> tags of the index.html page. It also binds the UI controls with the Model. To understand better, let’s look at the code snippet for one of the UI controls below:
...
...

var myDataModel = sap.ui.getCore().getModel("myDataModel");
...
...
// Create an text field
var txtName = new sap.ui.commons.TextField("txtField", {
	// bind text property of textfield to username property in the model
	value : "{myDataModel>/username}"
});
...
...
The above code creates a text field with an ID txtField and its value property is bound to the username property of the Model called myDataModel which we had created in the index.html. Once this binding is defined, whenever there is a change in the model, the control’s property gets updated and vice versa.
Similarly in the following code snippet, the press event of the button is bound to an event handler in the Controller. So whenever the button is pressed, the handler method of the Controller is called.
...
...
// Create a button to submit the name
var oBtn = new sap.ui.commons.Button({
	id : "btn",
	text : "Submit",
	press : oController.hello
});
...
...
Write Event Handlers in Controller
Copy and paste the following event handler function in the file Hello.controller.js at the end of the controller life cycle functions. This handler is called when the press event of the button is triggered. When the button is pressed, the value which the user enters in the text field is passed to the username field of the Model. The event handler function in the controller then pulls this value from Model.
hello : function() {
	var myDataModel = sap.ui.getCore().getModel("myDataModel");
	alert("Hello " + myDataModel.getProperty("/username"));
}
Deploy and Run Application
Start your server and deploy the application. Then open the following URL in browser http://localhost:8080/SAPUI5MVCDemo/index.html
Please use the port number according to your server configuration.
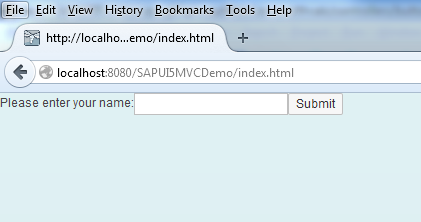
Type-in a name in the textbox and click on the Submit button. An alert box should be displayed.
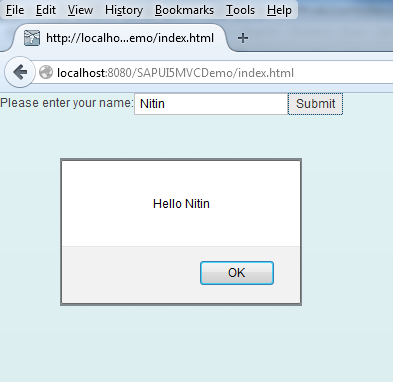
Congratulations!!! You’ve created your first SAPUI5 MVC application. For your reference, the project is attached below. See you in the next blog!
Nice article. A good place to figure out getting started.
Hi, I’ll post a similar blog showing the usage of XML views very soon. Subscribe and like planetofbits.com to stay updated.
Hi could you please provide the same program in XML
Nice blog for the start of SAPUI5, 🙂
Been looking everywhere for a simple, straightforward intro to this topic. Many Thanks