Often there is a need to decompile third party or standard Java classes to understand their code. But there is no built-in Java decompiler for Eclipse. However there are freely available external plugins which can be installed in Eclipse to create a built-in decompilation option. Java Decompiler project is one such plugin. In this blog, I’ll list down the steps required to install the JD-Eclipse plugin.
Step 1 – Install JD-Eclipse plugin
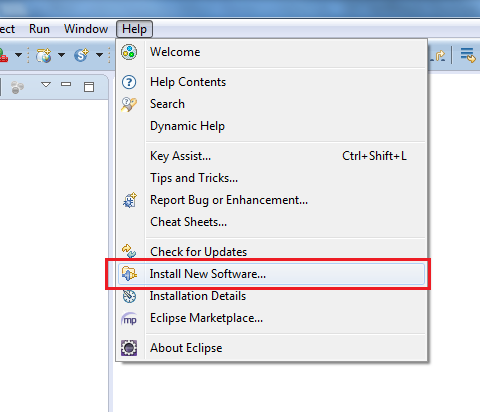
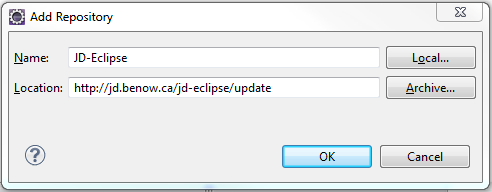
Open Eclipse and go to the menu option Help -> Install New Software… In the Available Software window, click on the link, Available Software Sites. In the window, click on Add button. In the pop-up window, provide any name to the site and paste the update site URL as http://jd.benow.ca/jd-eclipse/update and click on OK.
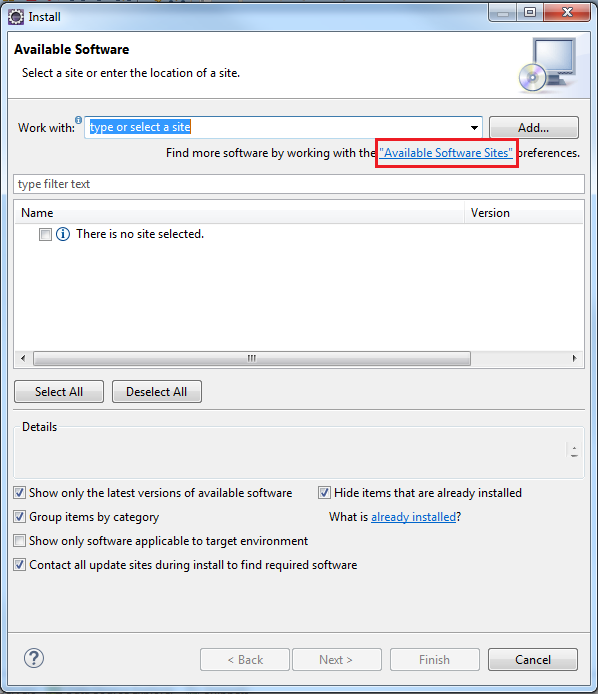

In the Available Software window, select the newly created site from the drop down and wait. Eclipse will fetch the list of plugins available for installation.
While updating Eclipse in a corporate network, a proxy authentication error might be thrown in case the proxy settings are not maintained in Eclipse. Please refer to my blog How to add proxy settings in Eclipse for solving proxy issues in Eclipse.

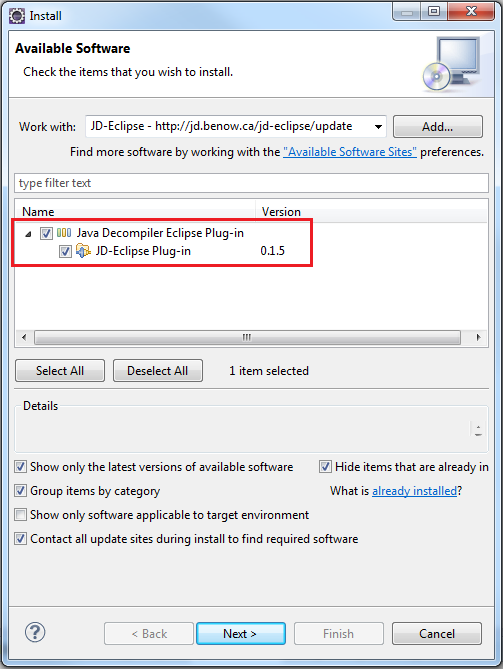
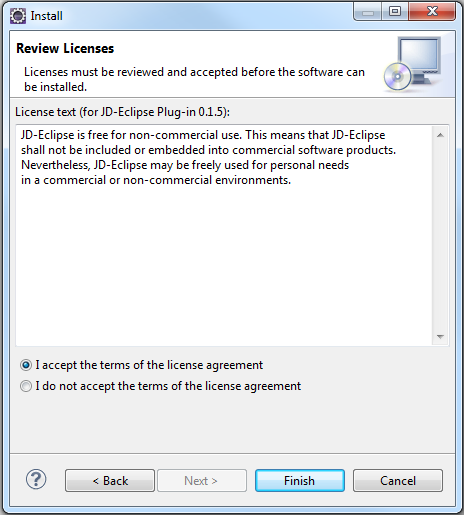
Select all the packages and click Next. Accept the license agreement and click Finish to begin the installation of plugin.
Restart Eclipse after the installation is finished.

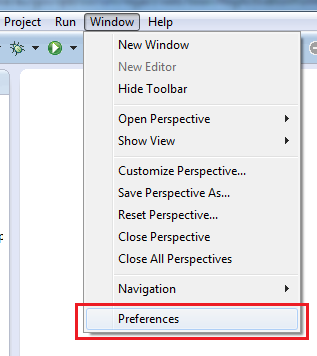
Step 2 – Make JD-Eclipse as default class editor
In the Eclipse menu and go to Window -> Preferences
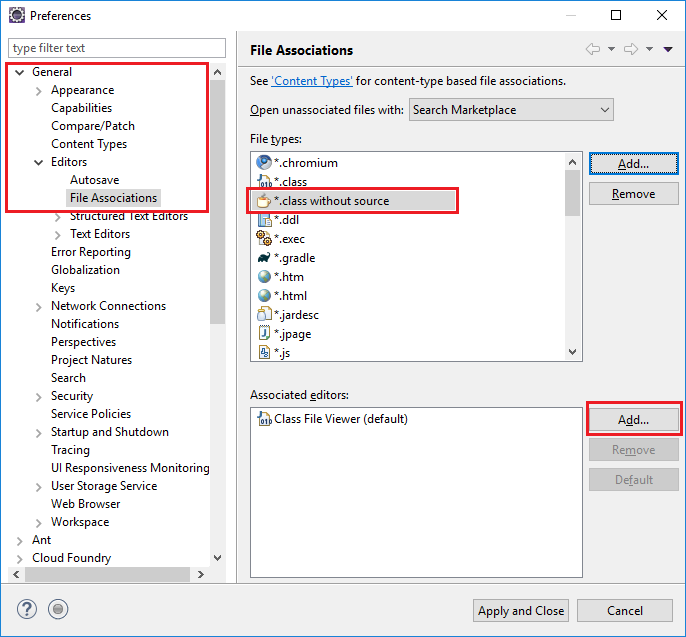
In the Preferences windows, go to General -> Editors -> File Associations. In the right-pane, select .class without source as the file type. In the Associated editors: section below, click on the Add button. In the pop-up window which opens up, select Internal editors and in the list below it, select the Class File Editor and click on the OK button
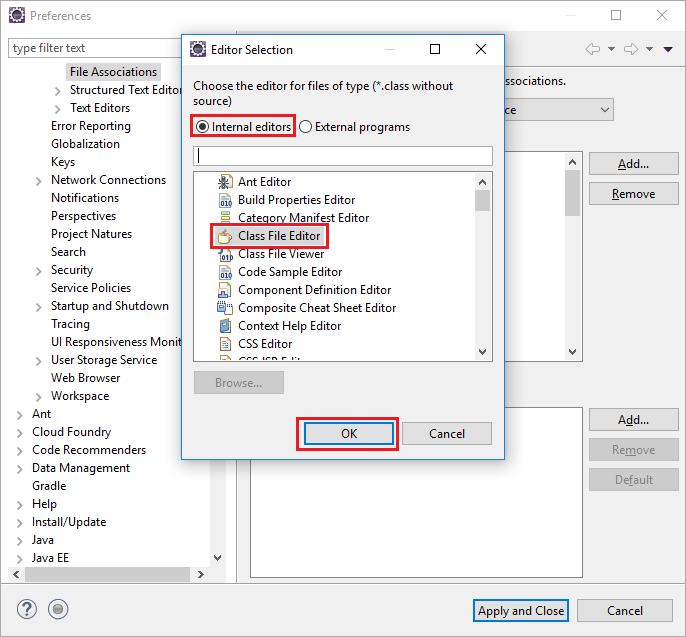
Select the Class File Editor (identified by the coffee-cup icon) and click on the Default button. This makes JD-Eclipse as the default decompiler for class files without source.


Now, simply double-click on any .class file and JD-Eclipse will decompile it for you. You can also place debug points in the decompiled classes while debugging your applications.
The JD-eclipse plugin can only decompile .class files that are visible from the classpath/build path.
Thanks a lot…
It worked thanks a lot
It worked
thanks for your help.